How To Add and Manage Events
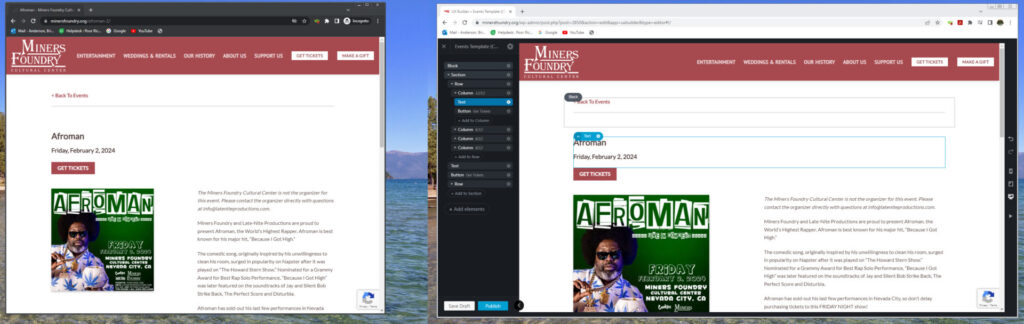
For any platform (wordpress, wix, etc) I always recommend to have two browser windows open. One is a standard browser window (right) and the other is one in ‘incognito mode’. (Right Click 3 Dots in upper right and you will see this option). This way, you can be an Admin editing the site AND a Patron visiting the site where you can see what they see and not what the Admin sees.
Main Events Area
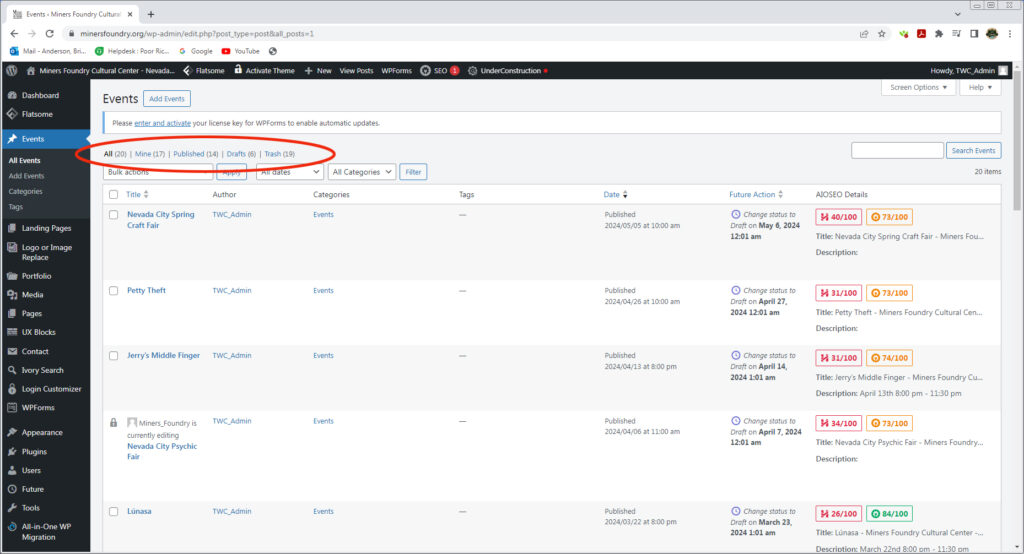
This is the Main Events Area. Events can be filtered via ALL, MINE, PUBLISHED, DRAFTS AND TRASH
PUBLISHED: Are live pages that can be viewed if you have the url.
DRAFTS: Are pages that can only be seen in the Admin area.
NOTE: In the actual Event, there is a place where you put the date and time as to when you want the Event to end and your choices are to mark it as a Draft or Trash. I would suggest always marking it as ‘Trash’, but, this is in place JUST IN CASE you created an event that you may want to re-use in the future; whether it’s similar layout, custom layout, etc. I’ll explain more later.
Note #2: When working on an Event, it is important to SAVE or PUBLISH the event and leave/close the event page. If you don’t, you will see a lock symbol on the list warning other admins to not edit the page concurrently or your edits may become lost. Only one admin should be editing at one time. e.g. The psychic event on this page.
First Image: Is an example of previous events being taken down and sent to drafts. I went ahead and sent these to trash and left behind the TEMPLATE DRAFTS that are to be used for future events.
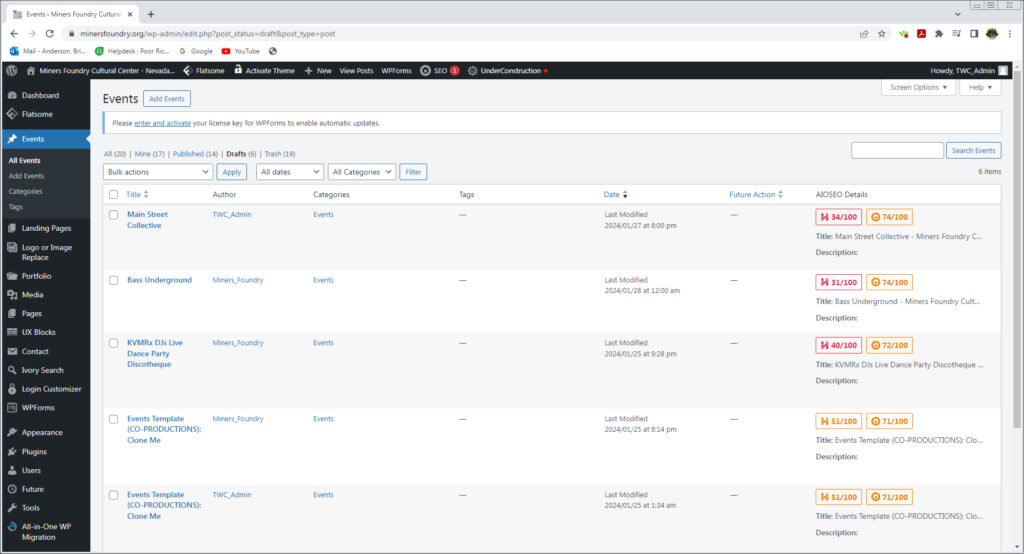
Second Image: The are the templates, one is for EventBrite Events and the is for Co-Production Events.
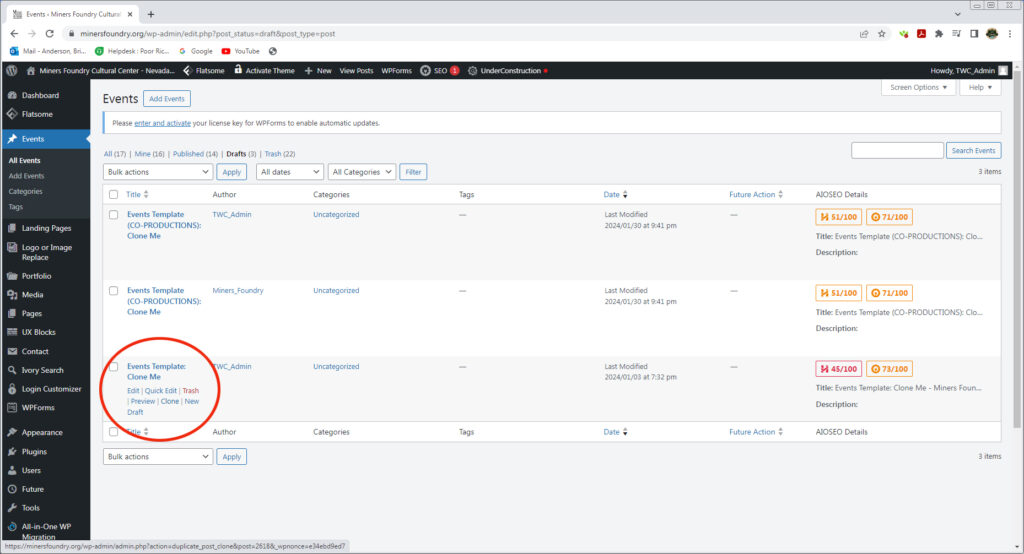
When you are ready to create an event, choose which template you want to use and click on ‘CLONE’. This will make a new page in the draft section. Open the new draft and begin editing it.
Event Post: Main Area
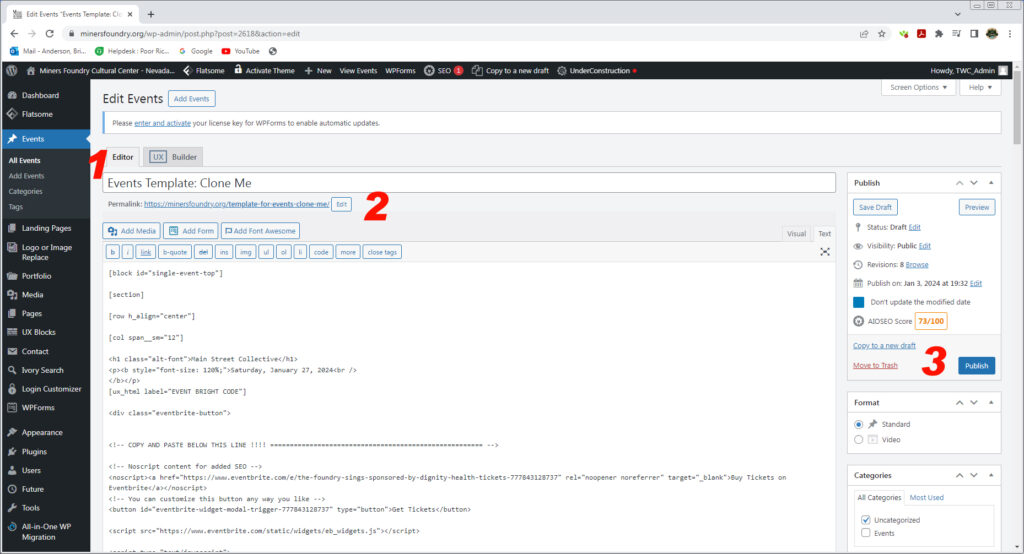
When you open the new Event, you will see it is an exact copy. So you will simply have to change the areas that need relate to your event.
#1. Put in the title of the event.
#2. Click the ‘Edit’ button next to the ‘Permalink’ and copy and pate the title of the event here. Because this is an exact copy of the template, you will need to manually do this. Once you publish this post, you can RIGHT CLICK on the url and choose ‘Open In Incognito Mode’.
#3. I suggest you hit ‘Publish’ as often as you can so you don’t lose any work. In this section, carefully assign the date and time of the event. The time is not important UNLESS there are two events on the SAME day. So, 99% of the time I would foresee only the date being entered.
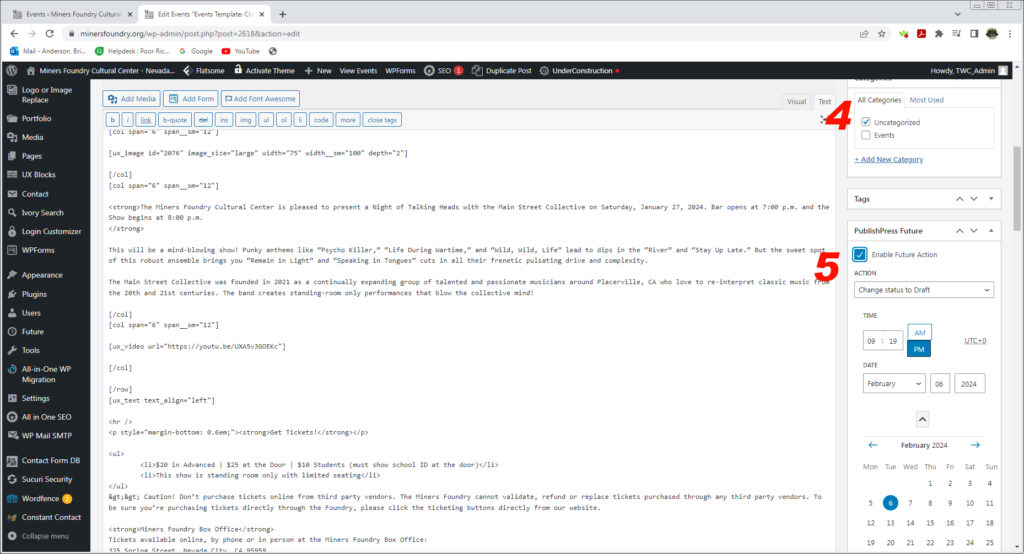
#4. This is an important step I put in so that you can view the event you are working on in INCOGNITO MODE (mentioned at the top of the page) and see it in the Admin window. Until you select ‘Events’ it will not show up on the Events Page Post Roll. It will be hidden and only accessible via direct link described in #2 in the previous section.
#5. This is where you specify when you want the Event to be taken down. You can choose to change the status to Draft or Trash (mentioned above). I would suggest choosing a time AFTER the event has concluded and you will likely always choose TRASH. The main point of this step is to keep your Events page cleaner and provide a way to save a template for an event you may want to use again later.
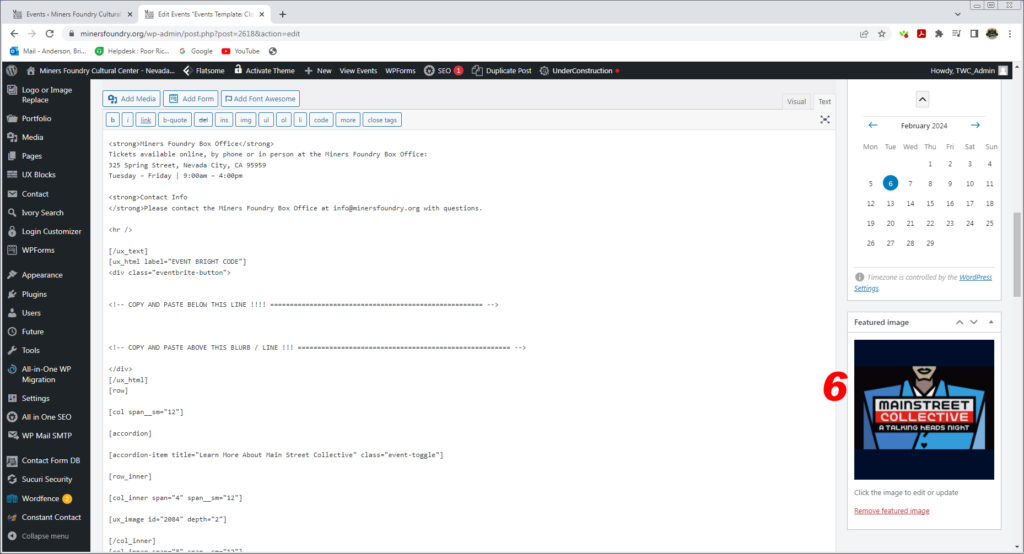
#6. The featured image is the poster for the Event. It only shows up on the Events Page AND the Home page under ‘UPCOMING EVENTS’.
Event Post: UX Builder
When you are ready to edit the actual content of the event, click on ‘UX Builder’ next to the #1 in the previous section above.
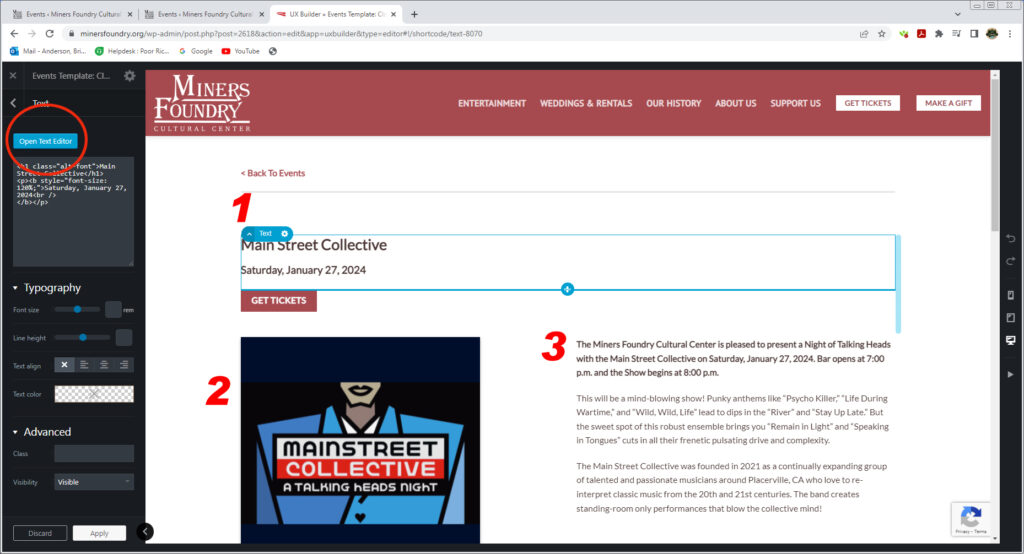
In the UX Builder, anything that is NOT a global element (header, footer, etc) is editable. When you click on anything, you will see your option in the black area on the left. Also, the left black area represents the structure of the page and is based on HTML5 standards, namely, Section, Row, Column.
To save your work, you click on ‘Update’ on the bottom of the black area. I suggest doing this often.
#1. When you click on a text element, you will see in the black area at the top a button called ‘Open Text Editor’. This will open a text editor similar to an email composer.
NOTE: For any builder out there, when you paste text from one program to another you MUST paste it as ‘Past as Plain Text’ There are a number of ways of doing this, but the most common is to right click and choose it from the options you have for pasting.
#2. This is the poster for this page ONLY. If you already set the featured image in the previous section (the poster), then this image is already in your media library and you can simply just choose it from there (and not re-upload another one).
#3. Same as #1.
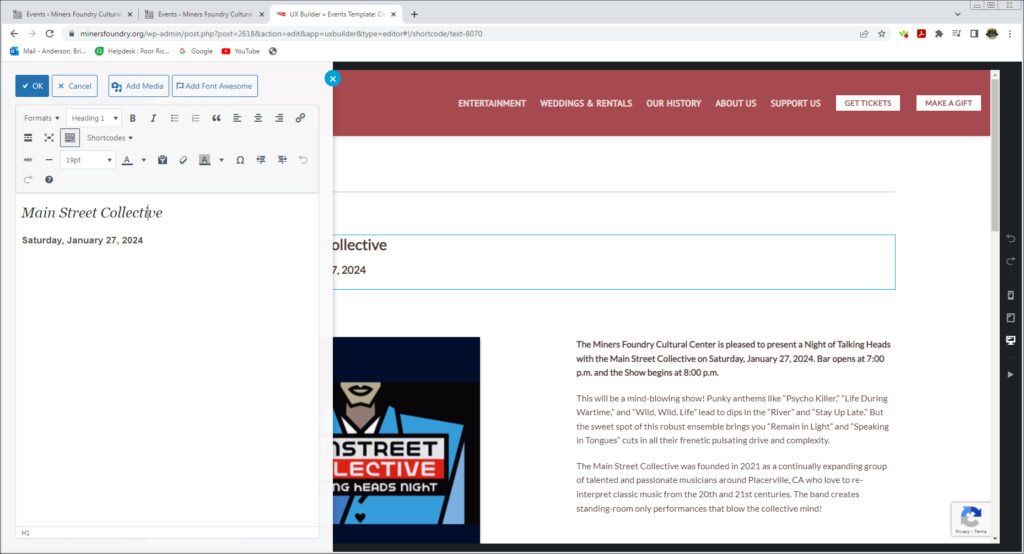
First image is an example of the Content Editor.
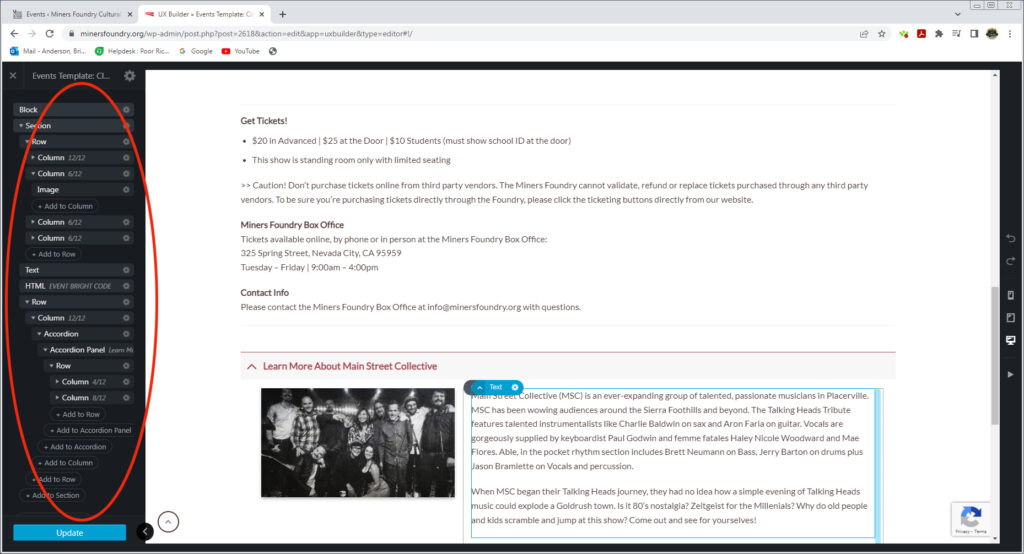
The second image is an example of the Page Structure.
In the UX Builder, anything that is NOT a global element (header, footer, etc) is editable. When you click on anything, you will see your option in the black area on the left. Also, the left black area represents the structure of the page and is based on HTML5 standards, namely, Section, Row, Column.
To save your work, you click on ‘Update’ on the bottom of the black area. I suggest doing this often.
#1. When you click on a text element, you will see in the black area at the top a button called ‘Open Text Editor’. This will open a text editor similar to an email composer.
NOTE: For any builder out there, when you paste text from one program to another you MUST paste it as ‘Past as Plain Text’ There are a number of ways of doing this, but the most common is to right click and choose it from the options you have for pasting.
#2. This is the poster for this page ONLY. If you already set the featured image in the previous section (the poster), then this image is already in your media library and you can simply just choose it from there (and not re-upload another one).
#3. Same as #1.
EventBrite Embedded Checkout Buttons
This step is more complicated than it needs to be, but hopefully I made this process a bit easier.

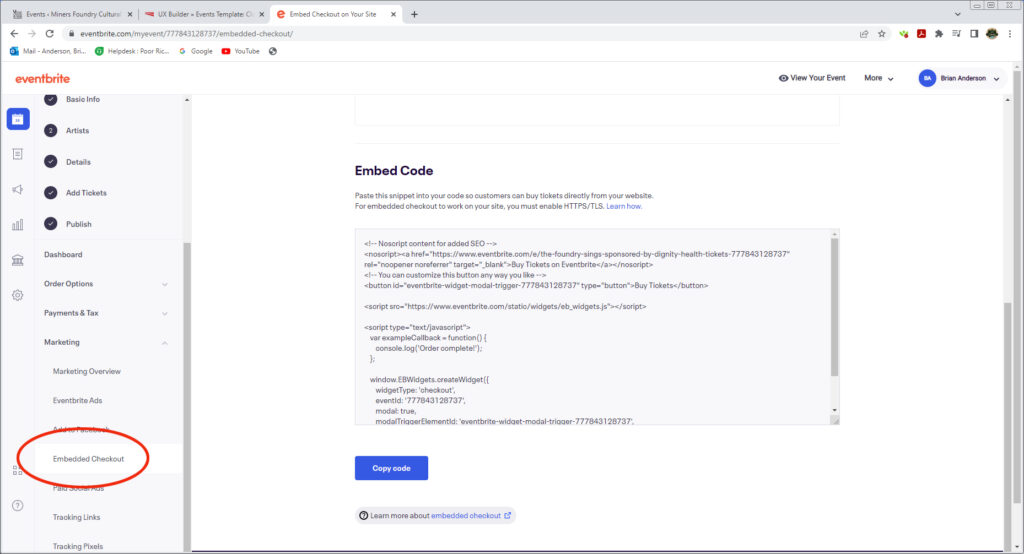
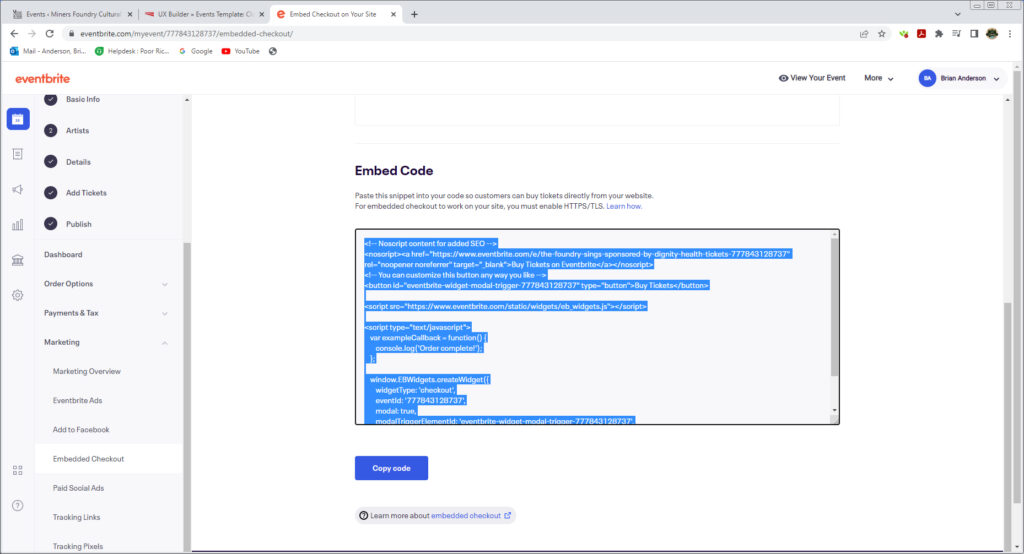
To get the Checkout Button code, navigate to your event in EventBrite, Click on ‘Marketing’ and then Click on ‘Embedded Checkout’ in the submenu.
Here you will find the code. Copy the code to your clipboard.
Important: There is a glitch in the code that needs to be fixed before it can work. I have been just making the edits in the UX Builder, but I can see how this can be cumbersome to someone who doesn’t know how to read code.
SO, I created a simple Word Doc Template for you to use to make the edits BEFORE you pasted it into the builder and then just copy and paste everything from the Word Doc Template into the UX Builder.
Here is the Word Doc Template.
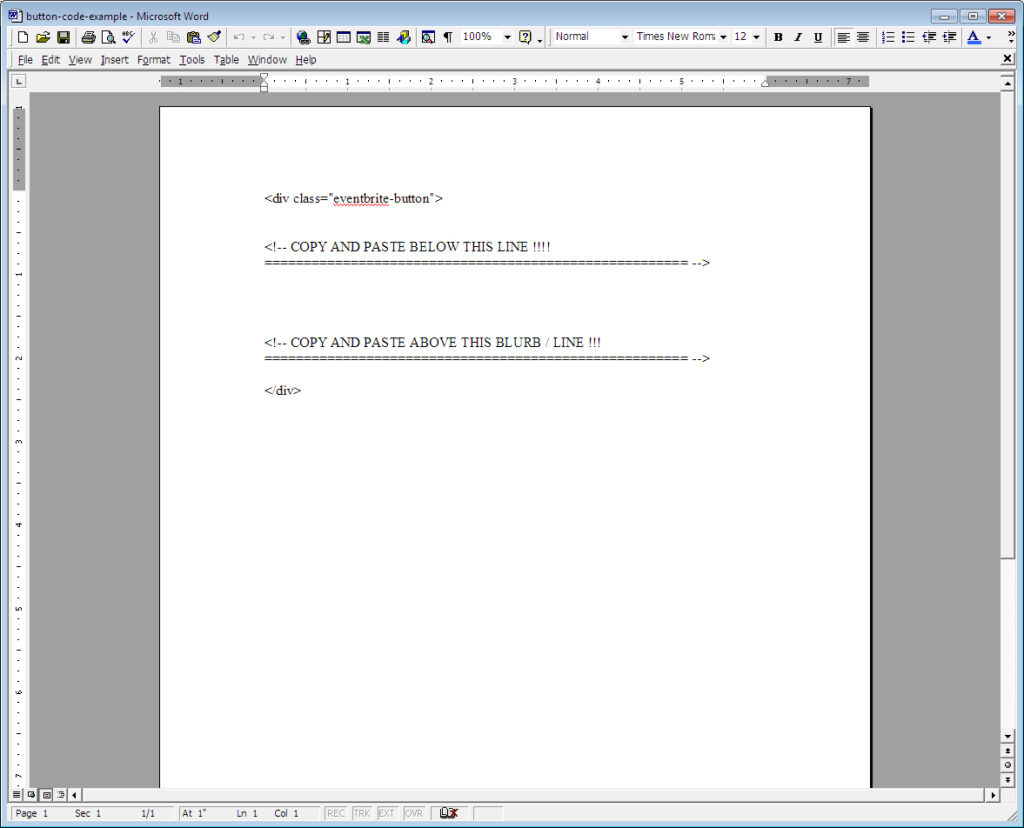
The first image is the Word Doc Template.
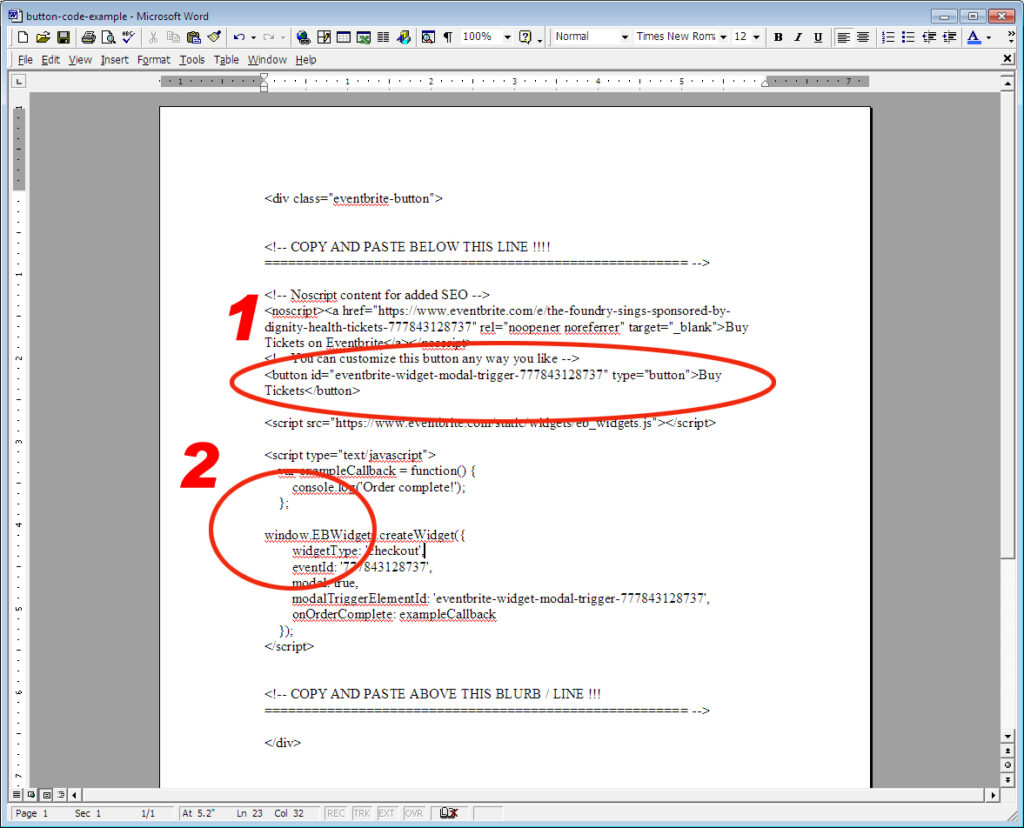
The second image is what it looks like after you paste the EventBrite code.
#1. If you wish to change ‘Buy Tickets’ to ‘Get Tickets’, this is where you do it.
#2. This is the glitch. You need to remove all line breaks between the ‘window.EBWidget’ and the ‘semi-colon’ before it.
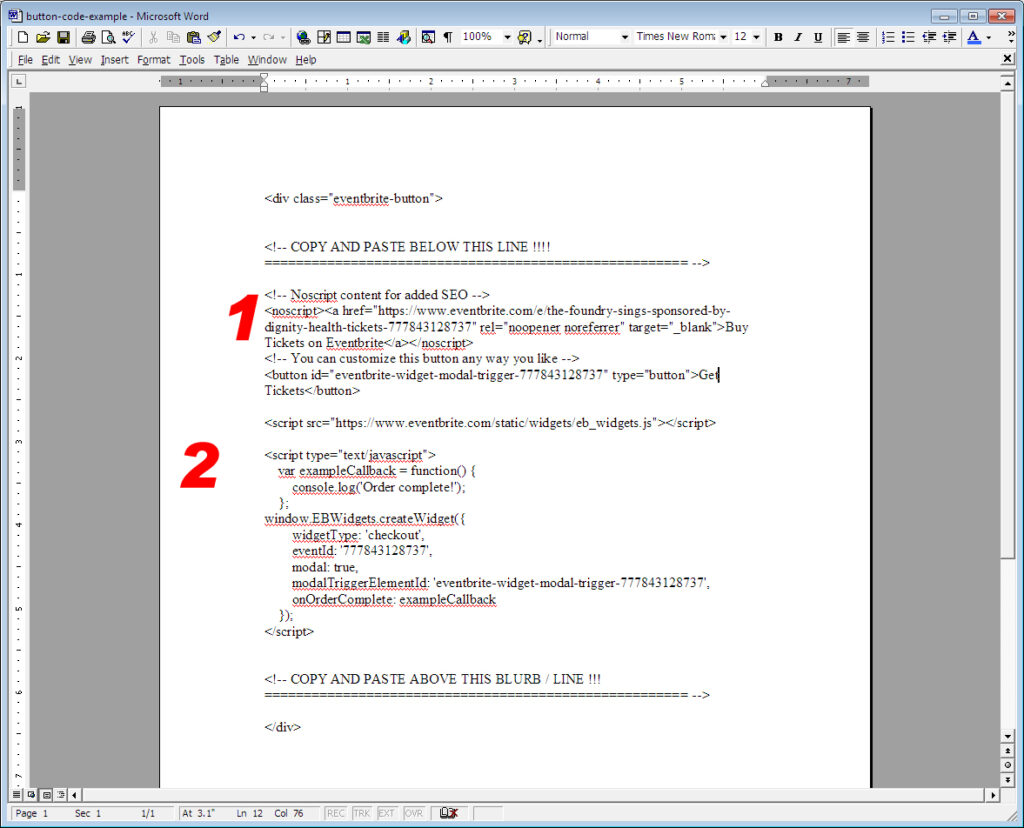
The third image is what it looks like when the code is correct.
When you are ready, copy EVERYTHING from the Word Doc Template.
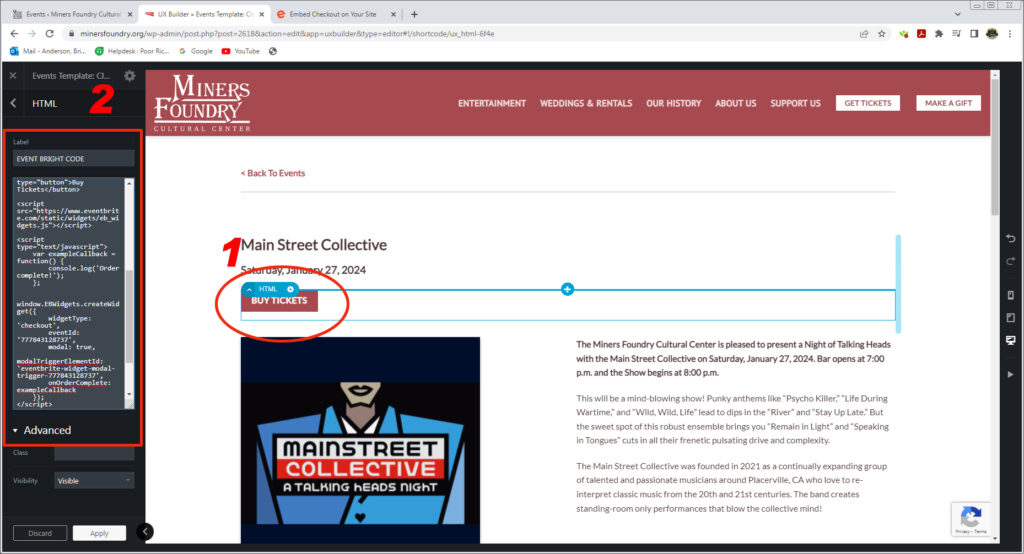
First image: Click on the button and area where you will post EVERYTHING from the Word Doc Template. Be sure to ‘Past as Plain Text’.
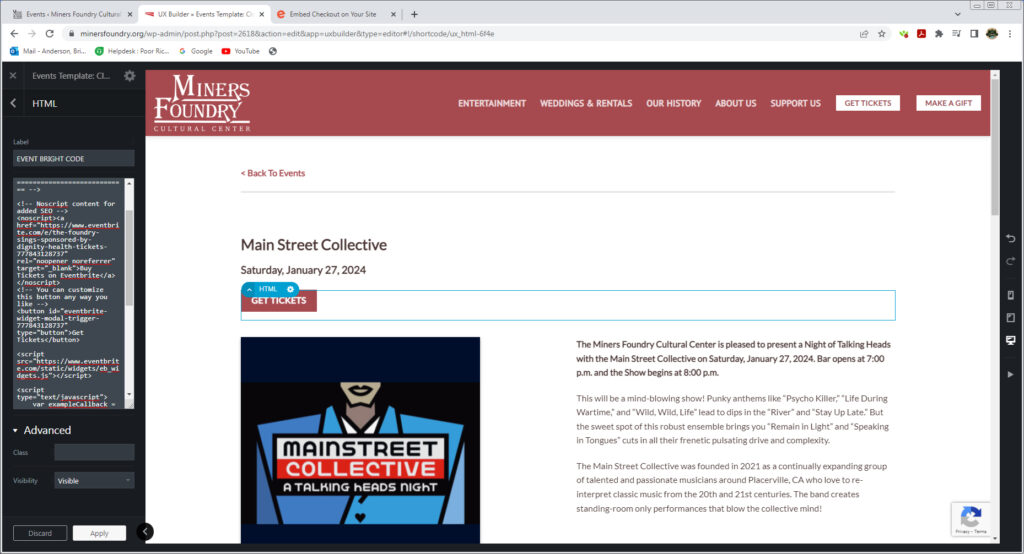
Second image: Just showing how the default text changes from Buy Tickets to Get Tickets.
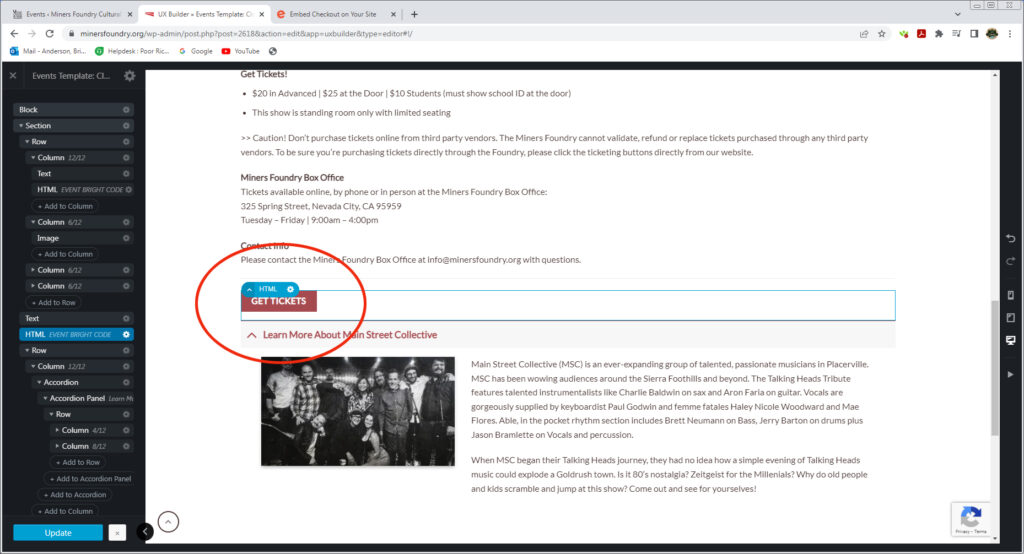
Third Image: Do the same for the lower button.
When you are all done editing this page and it has been ‘Updated’. You need to go back to the ‘Event Post: Main Area’. You can do this by clicking the ‘X’ in the UPPER LEFT in the Black Area.
Make sure everything looks good.
Fourth Image: When you are ready to GO LIVE, click on ‘Events’ in the #4 on this image and then click on ‘Publish’. Then you should be able to see the event LIVE on the Event Page and the Home Page.
When you get used to this process, an event should take about 15 minutes or less to be completed (granted everything you need is available).
Hope This Helps, Happy ‘Event’ing!